
Three plug-in open chillers can share an open front and multideck display but solve different store-planning problems. A top-light-box model adds a prominent upper display element; a bottom-compressor model concentrates the self-contained system in the base; and a semi-high model lowers the display profile. Choose the structure before asking for dimensions, shelf loading or price.
The right RFQ should describe the store zone, merchandise, sightline, service access and utility plan. Product photos help identify the variants, but the current drawing and technical schedule must control the order.
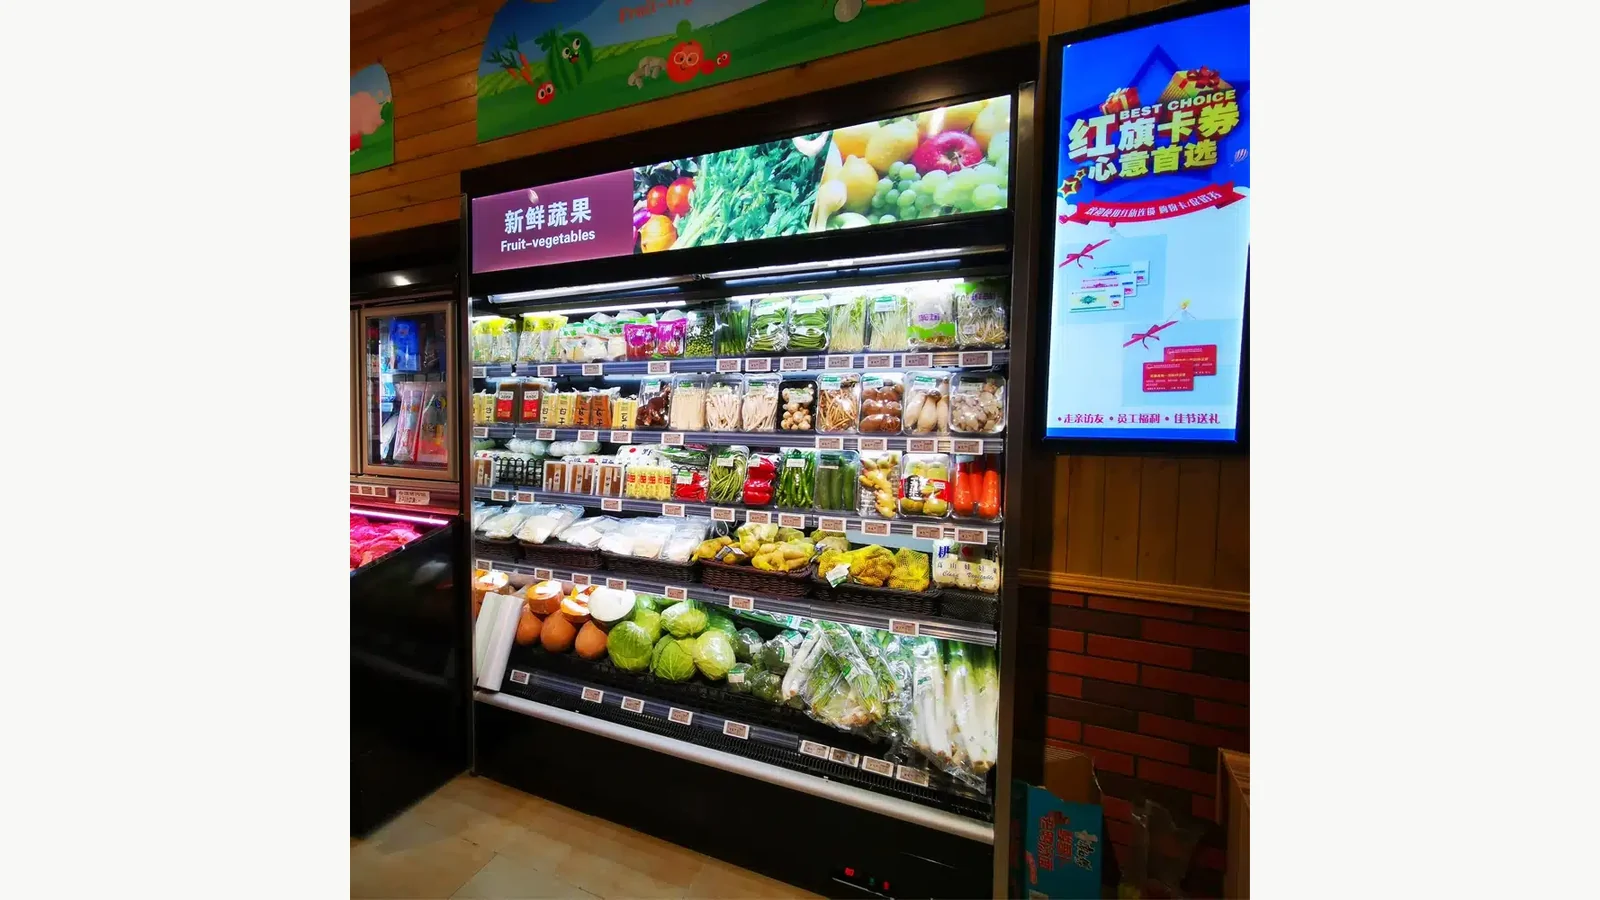
Compare the Three Listed Variants
| Variant | Published structure | Primary planning question | Exact product record |
|---|---|---|---|
| Top light box | Plug-in, open type, multideck, top light box | Is a tall branded header useful and clear of store constraints? | Plug-in multideck open chiller with top light box |
| Bottom-mounted compressor | Plug-in, open type | Can the base service zone, ventilation and access be protected? | Plug-in open chiller with bottom-mounted compressor |
| Semi-high multideck | Plug-in, open type, multideck, semi-high | Does a lower profile improve sightlines and shopper reach? | Plug-in semi-high multideck open chiller |
All three records support a commercial open-display discussion, but their labels cannot create one universal specification. Ask the supplier to confirm the current model code, overall dimensions, usable display dimensions, temperature range, refrigerant, electrical input, drainage arrangement, ventilation clearance, shelf count and load, lighting and packing.
When a Top Light Box Fits the Store Plan
A top light box creates a distinct visual cap above the open display. It can carry category or campaign graphics and help a fresh-produce, dairy, beverage or packaged-food zone read clearly from the aisle. That benefit should be tested against the real ceiling, signage, sprinkler, camera and sightline plan.
Record the total height with the light box, artwork dimensions, illumination specification, access method and replacement procedure. If the store has a standard fascia line, ask whether the supplied light box aligns with it. A product photo is useful for intent, but the approval drawing needs the actual interface.
The light box also changes receiving and installation planning. Confirm whether it ships assembled, folded or separate; whether it affects crate height; and whether installers need clearance above the cabinet to fit or service it.
When Bottom-Compressor Structure Drives the Decision
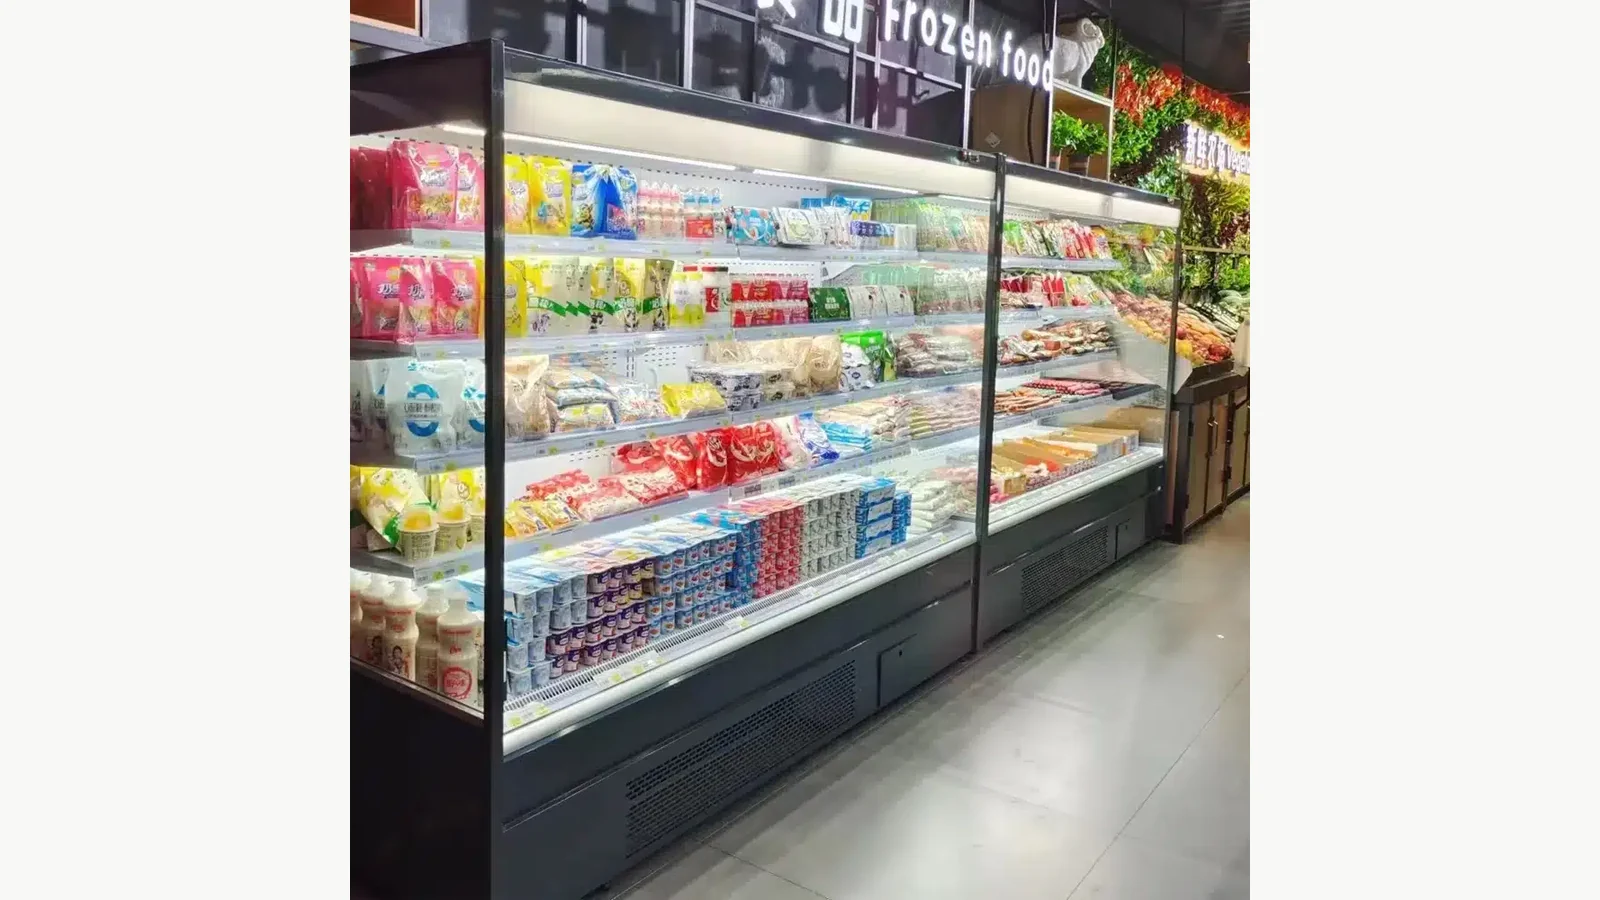
The bottom-compressor variant makes the self-contained base a key project interface. The store team should identify ventilation openings, removable panels, controller access and the clear zone needed for service. Keep a grille clear of kickplates, shelving, skirting and stock unless the approved drawing allows otherwise.
Check the floor too. A long loaded case needs a level, suitable support zone, while service panels need unobstructed reach. Ask where condensate goes and whether a drain or an internal evaporation arrangement is part of the selected model. Never infer “no drain required” from the word plug-in.
The published open-chiller power and drain coordination guide explains why plug, circuit and water-handling questions belong on the pre-installation drawing. Use those checks before finishes are closed.
When Semi-High Is the Better Merchandising Structure
A semi-high cabinet can preserve views across a department, reduce the visual wall created by a tall run and place more of the display within a lower reach zone. It may suit islands, perimeter transitions or promotional areas where height is a deliberate design variable.
Lower overall form does not automatically mean the same capacity, shelf count or product facing as a tall multideck. Build a merchandising plan from the current usable display envelope. Ask for shelf depth, vertical spacing, permitted shelf loading and any restrictions on blocking return-air paths.
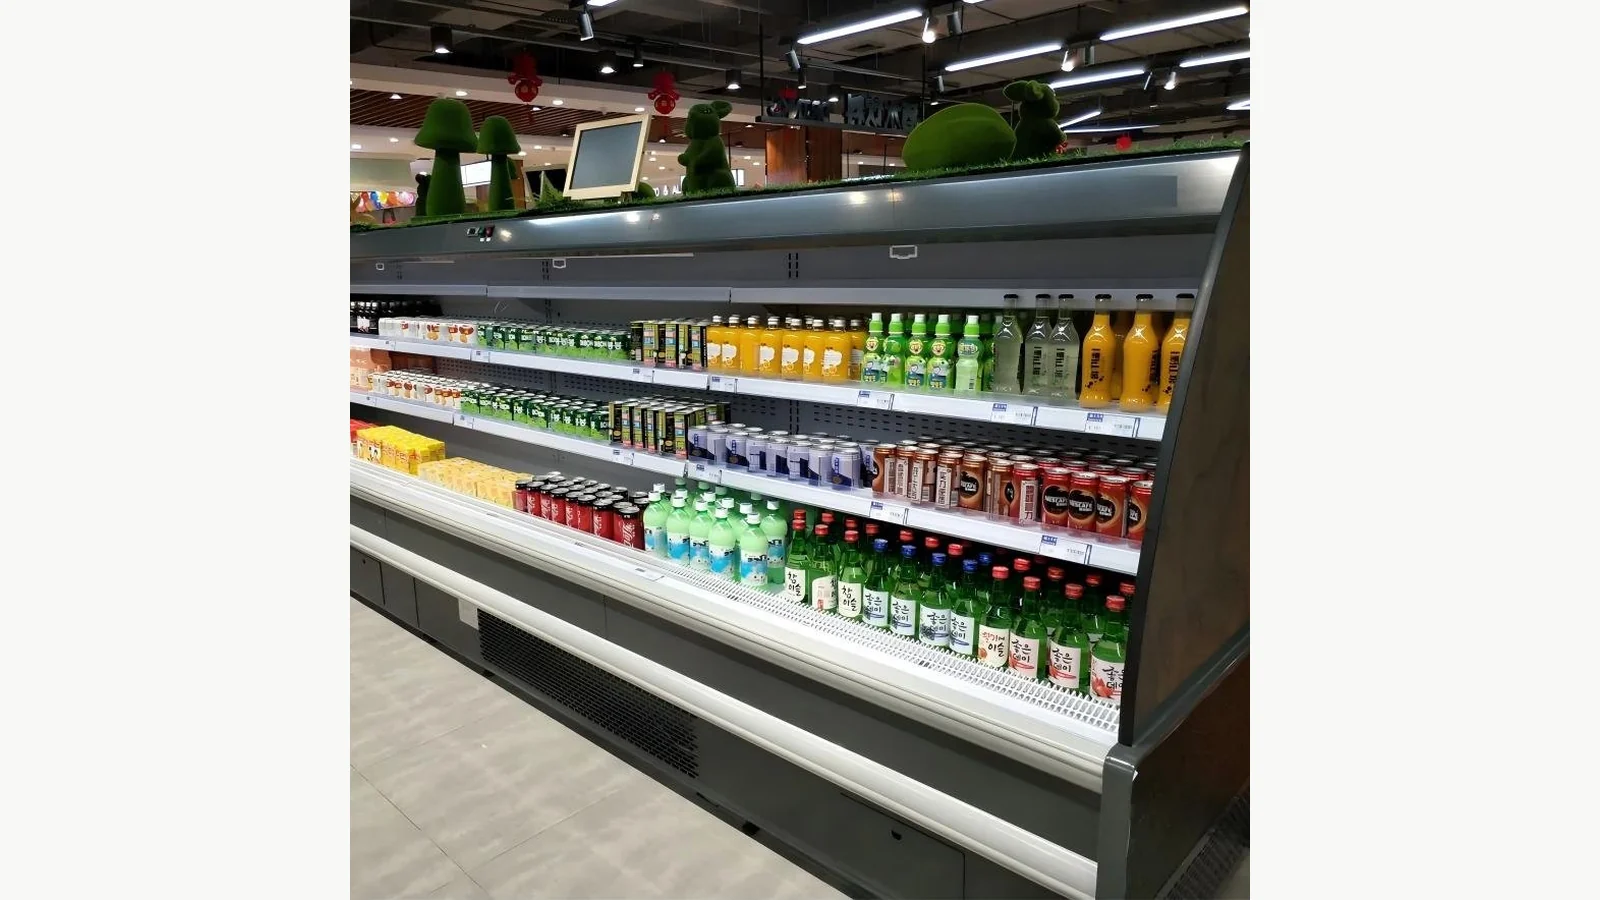
The photo shows a semi-high presentation with bottled beverages, but it does not prove a universal beverage capacity. Use real package dimensions and a shelf mock-up before setting facing counts or replenishment targets.
Run a Structure-First Store Survey
Before comparing prices, collect one measured survey for the proposed location:
- available length, depth and height;
- aisle width and shopper circulation;
- door, lift and turning constraints on the delivery path;
- floor level and finish transition;
- ceiling, sprinkler, lighting, sign and camera clearances;
- electrical position and circuit information;
- drain or condensate-handling provision;
- ventilation and service-access zones;
- adjacent hot, cold or high-airflow equipment;
- target merchandise and package sizes.
Mark the cabinet orientation and the side from which technicians will access key components. A plan that records only the front elevation is incomplete.
Build a Merchandising Test Before the RFQ Freezes
Select representative packages from the real assortment. Include the tallest bottle, deepest tray, widest multipack and any fragile produce container. Test them against a supplier drawing or sample shelf:
- front-edge retention and label visibility;
- shelf depth and rear clearance;
- vertical gap for removal and restocking;
- return-air and discharge-air paths;
- reach at the top and bottom display zones;
- shelf-loading evidence;
- price-strip and shelf-edge-label position.
Avoid filling unused drawing space with calculated facings and calling it guaranteed capacity. Package tolerances, shelf brackets, air paths and operational gaps change the result.
Compare Like-for-Like Technical Schedules
Put the three structures into one normalized table before choosing:
| RFQ field | Top light box | Bottom compressor | Semi-high |
|---|---|---|---|
| Exact model code | Confirm | Confirm | Confirm |
| Overall and usable dimensions | Confirm | Confirm | Confirm |
| Header/light-box details | Required | If offered | If offered |
| Compressor/service location | Confirm | Bottom-mounted | Confirm |
| Electrical input and plug | Confirm | Confirm | Confirm |
| Condensate/drain plan | Confirm | Confirm | Confirm |
| Ventilation clearances | Confirm | Base-critical | Confirm |
| Shelf count/depth/load | Confirm | Confirm | Confirm |
| Temperature and test conditions | Confirm | Confirm | Confirm |
| Packing and delivery path | Confirm | Confirm | Confirm |
“Plug-in” describes an installation approach, not a complete technical answer. The power supply, heat rejection, condensate handling and clearances still need project confirmation.
Approve One Structure on the Drawing and PO
Once selected, use one controlled model description across the drawing, quotation, purchase order, artwork, packing list and installation handover. If the supplier proposes a different top, base or height arrangement, treat it as a revised structure—not a cosmetic substitution.
Request front, side and plan views showing dimensions, service panels, ventilation openings, cable entry, drain point if applicable, shelf layout and light-box details. Add destination, quantity, packaging, unloading limitations and required commissioning documents.
Send a Structure-Controlled RFQ
Tell XCCOLD which of the three listed structures you are evaluating, then send the site survey, merchandise list, target package facings, utilities, clearances, service side, artwork needs and delivery route. Ask for a current model schedule and approval drawing before freezing store finishes.
That sequence makes price comparison meaningful. It also prevents a familiar project error: approving a generic “plug-in open chiller” and discovering later that the cabinet height, base service zone or display profile does not fit the intended store role.