
A combined island freezer is experienced as one long display, but it may be delivered and installed as several low horizontal modules. Small differences at joints can affect trim lines, glass-lid travel, cleaning, merchandising, and the finished appearance. Handover should identify each module and record the complete run before frozen products hide the details.
This guide concerns XCCOLD commercial island freezers with sliding glass lids and a frozen-food application. It does not apply to an open chiller, upright glass-door cabinet, or service counter.
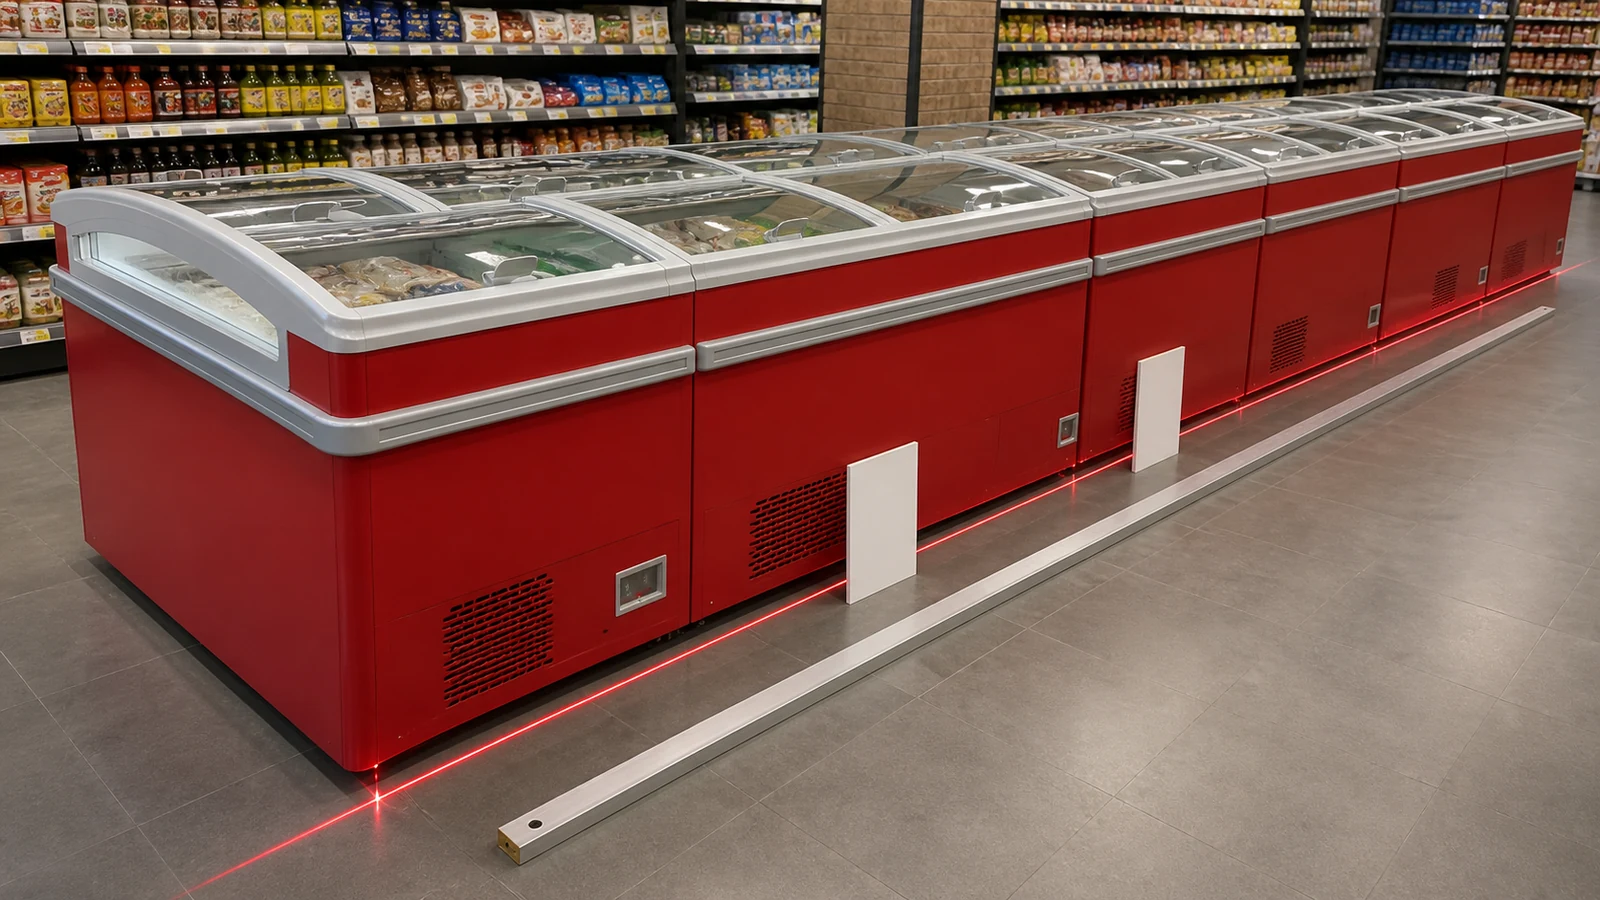
Confirm Product Structure and Module Sequence
Match the order, model documents, and site plan with the actual commercial island freezer. Record each module, end section, and any project-specific connection in one viewing direction.
Assign codes such as IF-01A, IF-01B, and IF-01C. Put the same codes on the floor plan, photographs, snag list, and service record. Similar red or white island modules can otherwise be confused.
Record whether the project uses plug-in or remote arrangements according to actual documents. Avoid assuming installation type from appearance.
Capture the Empty Run
Photograph both long sides and both ends before merchandising. Include floor joints, columns, surrounding cabinets, utilities, kick plates, trims, and aisle boundaries. Take additional views down the length of the run to show visible alignment.
Use fixed reference points and note camera direction. A close picture of one joint cannot show whether the whole line bends or follows an intentional store layout.
Keep protective materials until the inspection sequence allows removal, then photograph the revealed finish and glass condition.
Record Floor and Position References
Use the approved installation method to confirm cabinet position and level. Record the measuring equipment, reference points, and responsible installer. Finished floors may vary across a long run, and a visual judgment alone may miss the pattern.
| Check | Record | Why It Matters |
|---|---|---|
| Floor reference | Points and readings from approved method | Explains adjustments across modules |
| Centerline or grid | Distance from fixed store references | Preserves approved position |
| End clearance | Actual space and drawing reference | Protects aisle and endcap plan |
| Module sequence | Code and direction | Connects joints with records |
| Adjustment point | Location and approved action | Supports future review |
Avoid inserting temporary packing as a permanent correction unless the approved installation design calls for it.
Inspect Module Joints
Check top lines, glass frames, cabinet faces, base trims, bump rails, and end transitions. Record gaps, steps, twisted trim, missing covers, sharp edges, and finish damage by module code.
Some joints may require designed clearance or joining components. Compare with the manufacturer's documents rather than forcing every visible line closed.
Photograph each joint from customer side, opposite side, and above where safe. Include a scale reference for any measured gap without scratching the finish.
Test Every Sliding Glass Lid
Move each lid through its normal path according to the equipment manual. Record the panel and section code, starting position, travel, overlap, handle condition, track cleanliness, contact points, and final closed position.
Avoid forcing a resistant panel. Check for packaging debris, labels, displaced trim, misalignment, or visible damage, then refer unresolved conditions to qualified installation or service personnel.
Test neighboring lids together where their overlap or travel interacts. A panel that moves alone may contact another when the normal sequence is used.
Check End Panels and Accessories
Inspect end panels, corner protectors, bumper rails, trim pieces, dividers, baskets, and supplied accessories against the order and packing list. Keep product-specific parts separated by module.
Record finish shade and alignment under consistent lighting. Reflections from glass and store lights can make an edge appear uneven, so use several views.
Missing or damaged accessories belong on the handover list with quantity, module, and packaging reference.
Verify Aisle and Customer Use
Mark the shopper position when a sliding lid is opened. Confirm that neighboring displays, promotional fixtures, baskets, and carts leave the intended access available.
The island freezer trolley-access planning covers shopper flow in more detail. Here, record actual conflicts at the installed run.
Check sightlines, corners, and protruding components. Store fixtures added after equipment placement should remain outside the lid and service zones.
Preserve Cleaning and Service Access
Record access to lid tracks, glass, cabinet edges, floor around the base, drainage or utility points where present, and service panels identified in the model documents. Confirm which trims are removable and who is authorized to remove them.
Avoid sealing or covering joints before the installer confirms the approved detail. Cleaning materials and water methods need to follow the equipment manual.
Take a clean baseline photograph of tracks and joints for future comparison.
Complete Functional Handover Separately
Physical alignment and lid travel are only part of equipment handover. Electrical, refrigeration, control, temperature, defrost, drainage, and commissioning checks require the model-specific project procedure and qualified personnel.
Record those results in their own documents. Avoid treating a visually aligned cabinet as proof of full commissioning.
Link the installation checklist to the exact module codes and project drawing revision.
Close the Snag List
For every issue, record module, location, observation, photograph, owner, action, and closeout evidence. Recheck neighboring lids and trims after an adjustment because one change can affect the joint.
Finish with wide photographs of the accepted empty run and the final merchandise state when appropriate. Preserve the empty view for future service.
Related Reading
- island freezer trolley-access planning covers shopper and cart access.
- Commercial Refrigeration Delivery Path supports safe movement before alignment.
Common Questions
Must every module joint be visually invisible?
Use the product design and approved installation criteria. Record gaps and steps rather than inventing a universal cosmetic limit.
What if one lid feels harder to move?
Stop forcing it, preserve the position, check visible obstruction, and request qualified review.
Should alignment be checked after loading?
The empty run provides the clearest baseline. Follow project requirements for any later recheck.
Can store staff adjust leveling points?
Adjustment belongs to authorized installation or service procedures for the actual model.
Send the Module Map
Use the XCCOLD contact page to share model, installation type, module sequence, floor and position references, joint photos, lid-travel observations, accessories, and drawing revision. Exact location codes make the handover actionable.